|
Slide jack under the bike on the rear shock
mount. raise the jack so the bikes rear tire is off of the lift a
couple of inches.
######################################################

Slide a 2 x 4 through the middle of the bike just above the frame,
use a couple of straps around the 2 x 4 and frame on each side of
the bike. Set jack stands under the 2 x 4.This will support the
bike during the installation of the rear end.
######################################################

Lower the jack to take pressure off of the shock, remove the
shock.
######################################################
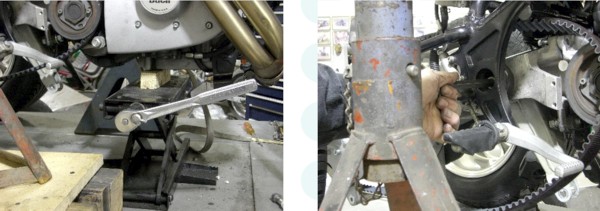
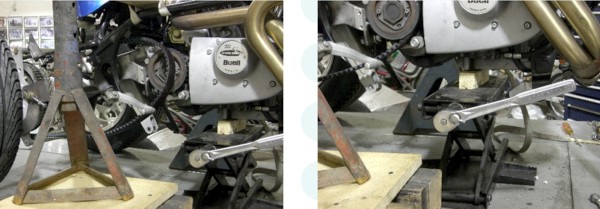
Set the jack under the rear of the motor, this
will support the motor during installation of the rear end. Remove
swing arm allen
bolts on both sides of the bike.
######################################################

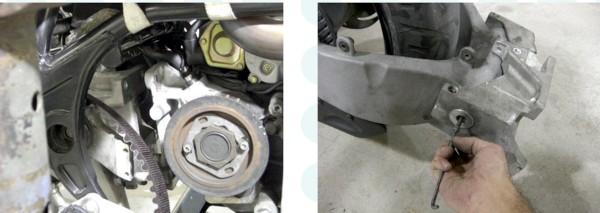
Remove the top rear motor mount bolts.
Remove the bottom rear motor mount bolts.
######################################################
Slide the belt off of the transmission pulley. Have a friend help
remove the rear wheel and swing arm. Remove thin allen bolt inside
swing arm pivot.
######################################################
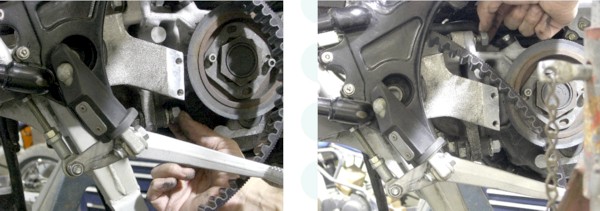
Loosen both pinch bolts on rear motor mount,
screw in the 2 big allen bolts into each side of swing arm pivot
and pull swing arm pivot inserts out.
######################################################
 Remove swing arm from rear motor mount. Remove rear axle.
######################################################
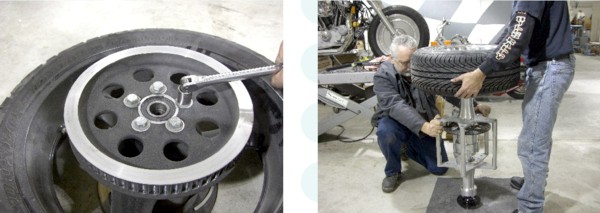
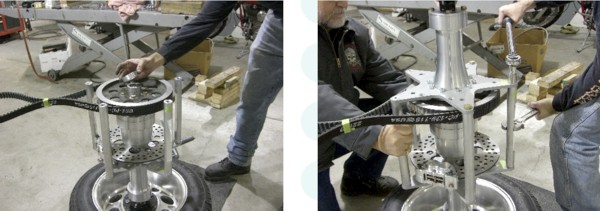
Remove the pulley from the
rear wheel. Have a friend help hold the rear end while you install
a wheel and tire on the brake side of the rear end. Tighten the
lug nuts, you will torque the lug nuts later. ######################################################
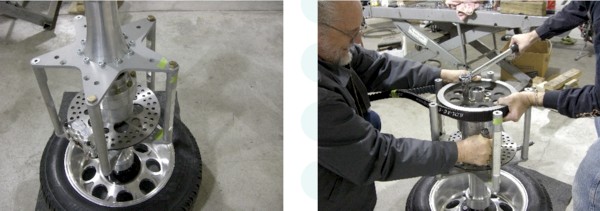
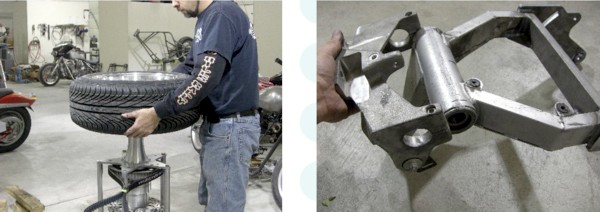
Turn the rear end over on to the wheel that was just installed.
Mark the star plate and a spoke with green tape to help realign
when reinstalling star plate. Remove the five bolts in the star
plate to spokes, lift and remove the star plate with axle housing
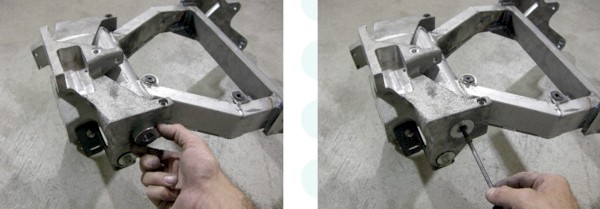
and axle as a unit. Install pulley and new longer belt as shown.
The spoke that was marked with the green tape is at the back side
of the rear end. The belt should be inside of all of the spokes
except the front spoke. Install 7/16" pulley bolts with lock
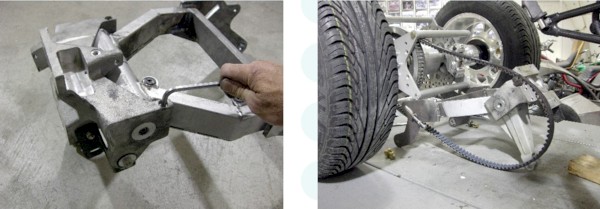
washer provided apply blue loctite and torque the pulley bolts.
Have friend help hold the center section of the rear end with a
screw driver through a hole in the rotor through one of the holes
in the star plate. Torque the pulley bolts 55 to 65 ft. lbs.
######################################################
Install spacer on the differential spigot.
Install axle, axle housing and star plate as a unit, Line up
points of the star plate with the green tape. Install bolts
through star plate to the spokes. Have a friend help hold the rear
end while you remove star plate bolts one at a time apply blue
loctite and hold adjustable wrench on flat area of spoke to torque
bolts to 70 ft. lbs.
######################################################
Install other wheel and tire on the axle.
Tighten lug nuts, you will torque the lug nuts later. Install rear
motor mount on to swing arm.
######################################################
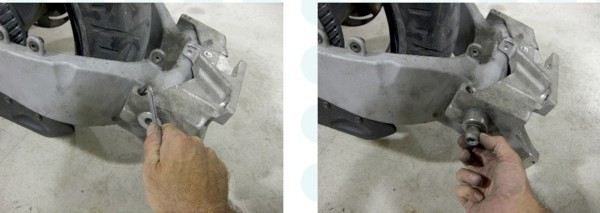
Install swing arm pivot inserts on both sides.
Install thin allen bolt inside
swing arm pivot torque 11 to 12 ft. lbs.
######################################################
Tighten both pinch bolts on rear motor mount,
Torque pinch bolts 18 to 20 ft. lbs. Position the
rear end behind the swing arm.
######################################################

Install lower swing arm mounting bolts both side
leave loose. Install upper swing arm mounting bolts, make sure to
put the washer between the swing arm and the star plate on both
sides leave loose.
######################################################

Have a friend help roll the rear end and swing arm in to position
for installation.
######################################################

Have a friend help slide the swing arm back in
to the frame. (This is a little
tricky but have patience) Install swing arm allen bolts. Install
rear motor mount bolts. Torque swing arm allen bolts 63 to 70 ft.
lbs. Torque the top rear motor mount bolts 41 to 45 ft. lbs.
Torque the bottom rear motor mount bolts 68 to 75 ft. lbs.
######################################################
Slide belt on to transmission pulley. Remove the
jack from under the rear of the motor.
######################################################
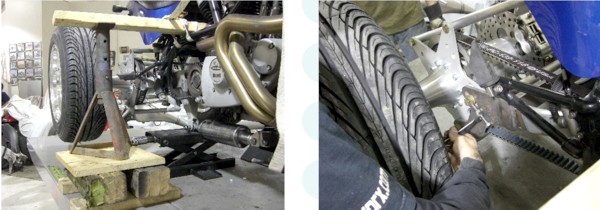
Install shock in rear mount. Set jack under rear
shock mount, raise the jack until you can slide the front shock
mounting bolt in. Torque rear shock bolt 30 to 33 ft. lbs. Torque
front shock bolt 40 to 45 ft. lbs. Reinstall transmission pulley
cover and muffler. Lower trike down on to the ground.
The trike must be sitting on the ground on
its suspension to adjust the belt. Adjust belt tension to
factory specs. Tighten jam nut on adjuster bolts and torque the
four rear end mounting bolts to 104 ft. lbs. Install brake line to
rear caliper and bled brakes. Torque lug nuts 78 to 85 ft. lbs.
Go for a ride. Re-torque lug nuts after 25 miles or 100 mile
maximum.
######################################################
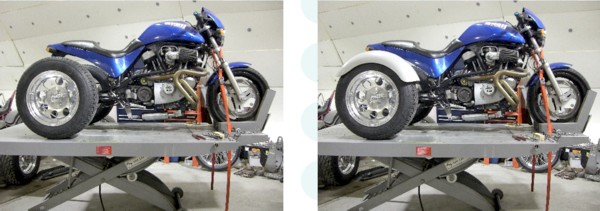
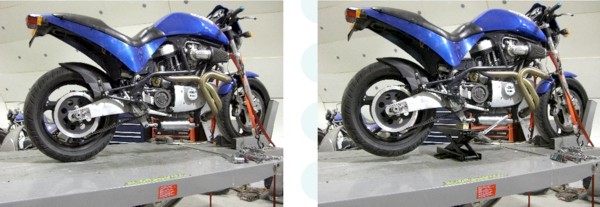
The above pictures show the completed Buell with
and without fenders, with a lowering kit installed.
######################################################

The above pictures show the completed Buell with
and without fenders. This is without the lowering kit installed. |